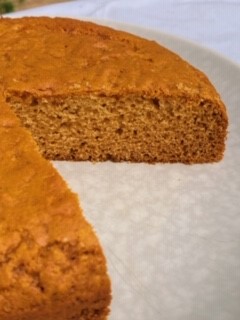
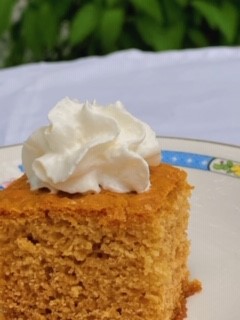
top of page
  • Writer's pictureNicky

Updated: Aug 1, 2022


My grandmother calls this an 'afternoon tea special' but I would call it a Rock Bun, something I learned to make in ‘Domestic Science’ class at school in England.


War time rationing dictated that it contain little butter and sugar, a cupful of milk and a dried egg. I have followed her recipe to the letter, (apart from the dried egg) although these days two eggs and less milk seems to be the norm.


This is similar to a fruity scone but no cutters are needed. Simply roughly pile the mixture onto a baking tray and it will come out looking like a rock! Best eaten warm from the oven with loads of butter and even jam!


450g plain flour

3 tsp baking powder

pinch of salt

50g butter, softened

50g caster sugar

125g sultanas or chopped dates

1 egg, beaten

200ml milk


Preheat the oven to 200ºC


Line 2 baking sheets with greaseproof paper


Sieve the flour with the baking powder and salt. Beat together the butter and sugar and add the beaten egg with a spoonful of the flour mixture. Then alternately add the rest of the flour mixture and milk. When combined, stir in the fruit.

You should now have a soft dough which you can ‘chop in lumps’ and place on the baking tray. Shake a little sugar on the top, demerara gives a good crunch if you have it.


Bake for 15-20 minutes, (depending on the size of your buns) or ‘until well browned’.


  • Writer's pictureNicky

Updated: Jun 26, 2023

An age-old fruit with a short growing season, gooseberries can be hard to come by. Try farmers markets or friendly neighbours who sometimes have a bush or two. The berries are usually green, but you can sometimes get red or yellow varieties.


Gooseberry jam

Gooseberries are high in pectin, meaning the jam will set very quickly and it is very easy to make. As a result, I make this every year as my family love it and it is not easy to find in the shops. It has a sweet, tart flavour and is superb on homemade scones or even your morning toast.


I found this gooseberry and elderflower jam recipe stuck into my grandmother’s note book. The two go very well together and if you can gather some elderflowers from a nearby hedgerow, so much the better. But don't forget to wash them!


And here is my recipe – no elderflowers!


1 kg gooseberries – washed, topped and tailed

1 kg granulated sugar

150 ml water

Wash your jam jars in hot soapy water, rinse and place in a low oven for about 10 minutes or until they are dry.


Put a plate in the freezer.

Have a look at 'all you need to know about making jam' to learn about testing for set and tips on sterilising and filling the jars.


Put the gooseberries into a large saucepan or preserving pan with the water and simmer until soft – about 10 minutes.

Add the sugar to pan and heat slowly until dissolved. Then bring to the boil for 8-10 minutes. If you think it might be catching on the bottom, give it a quick stir but be careful, as the jam will be very hot.

Remove your plate from the freezer and test for set by putting a small amount of the jam on to the cold plate. Push your finger across it and if it wrinkles, it is ready. If not, give it another five minutes. Remove from the heat and stir in a knob of butter. This will get rid of any scum that has formed. Leave to cool for 15 minutes before putting into warm sterilised jars.


Makes about 5 jars.


  • Writer's pictureNicky

Updated: Aug 1, 2022

My parents were lucky enough to have fruit trees in their garden so making jam or jelly was very economical. Even now, I seek out cheap fruit at farmers markets unless, of course, I am lucky enough to be given some by a kind neighbour.


Jam is surprisingly easy to make as long as you follow a few simple rules. Jelly takes a bit longer as you have to strain the fruit either through a sieve lined with a piece of muslin, or in my mother’s case, a (clean!) pillow case hung between 2 chairs.


Here are my rules –


  • Use a large preserving or enamel pan. Don’t overfill the pan as jam tends to rise when boiling and it can overflow or splash. I find it easier to make small quantities. Note : do not use an aluminium pan as the acid in the fruit will react with it and there is a danger that the jam will end up with a metallic taste.

  • When adding the sugar, keep a low heat so it doesn’t burn on the bottom of the pan, stirring from time to time. Then once dissolved, boil rapidly without stirring.

  • The time it takes to set, depends on the fruit and this will vary dependent on the amount of pectin or acid in them. If the fruit is slightly under ripe, it contains more pectin. Those fruits with a low pectin content (strawberries, cherries, apricots) may require the addition of lemon juice. Those fruits with a good set (high pectin content) include apples, gooseberries, plums and blackcurrants.

  • Testing for set - the first thing to do is to put a small plate in the freezer. And remember to test early. Depending on the fruit, some jam only needs 5 minutes, others take 10-15 minutes. Drop a small amount of the jam onto the cold plate, leave to cool slightly and then push with your finger. If wrinkles form, the jam is ready. Take it off the heat while you’re doing this so it doesn’t overcook. If it is not ready, boil for another few minutes and try again.

  • Sterilising the jars – this is crucial and not difficult. Simply wash the jars in hot soapy water, rinse and place in a low oven for 10 minutes or until they are dry.

  • Filling the jars – leave the jam in the preserving pan for a short while to cool slightly as this will prevent whole fruits rising to the top when it's potted up. I use a tablespoon rather than a ladle to spoon the jam straight into a jam funnel (which saves drips) and into the warm jars. Cover immediately. When cold, label with name and ‘best before date’. I give jams about 12 months.

bottom of page